Quick Start with the Keyboard
The user can begin playing on the Byzantine Organ immediately by using the computer keyboard or mouse.
Playing Melody
The middle row of keys (A–L) plays the basic notes of the scale. The upper row (Q–P) activates the corresponding sharps, while the lower row (Z–M) plays the flats of the same notes. If the “Sustain” option is enabled, the melody stops with the SPACE key or by right-clicking on any note of melody.
Playing Ison (Drone)
The numpad keys (0–9) reproduce the notes of the Ison (Drone). If the “Sustain” option is enabled, the Ison stops with the numpad decimal key (.) or by right-clicking on any note of Ison.
Both the Melody and the Ison stop together using the ESCAPE key.
Modes Switching
The keys F1 to F8 correspond to several basic modes from the Echoi panel.
Applying Alterations
Additionally, the number keys 1 to 9 activate the available alterations, while the keys 0, – and = activate the chroes, allowing temporary alteration to the melody.
First, the alteration is selected using the corresponding key, and then it is applied to the very next note that will be played.
The Tilde key (~), located to the left of the 1 key, is used to clear the alteration.
Ready for use
With these default settings, the Byzantine Organ is ready from the very first moment for the user’s initial exploration. The user may then adjust all settings and key mappings according to personal needs and skill level.
For further configuration and customization, the detailed guide follows.
Detailed Guide
"Byzantine Organ" Main Tab
The main tab is the Byzantine Organ's interface. It is divided into panels, organized according to their functions.
Instrument Console Panel
The first panel is the Instrument Console, which includes the settings for the Melody Instrument and the Ison (Drone) Instrument, the Pitch Shift and the indicator of the MIDI Keyboard Connection.

In the Melody Instrument (as well as in the Ison (Drone) Instrument) there is a dropdown menu from which you can select an SoundFont Library (SF2) from the available options. Each SoundFont contains recorded samples of instruments. By default, only one library is included, but you can search online and add additional SoundFont2 files (.sf2). Directly below, there is a second drop‑down list where you can select the instrument (preset) you want to use.
Below, there is an On/Off switch called Sustain. When set to Off , the note stops playing as soon as you release the key. When set to On , the note continues to play even after the key is released, until another key is pressed.
Next to it, you will find the Volume and Pan-sliders. Right‑clicking on either slider resets it to its default position.
Below them is the Octave Selector. Right‑clicking on the number resets it to 0.
The Pitch Shift shifts the pitch of the entire instrument by one semitone (6 micro-intervals) at a time.
The MIDI Keyboard Connection indicator shows a green or red status, informing you whether a MIDI keyboard is connected to your computer. Clicking on the icon performs a new connectivity check.
Scale Panel
The Scale Panel is located on the right side of the application window and contains the musical scale. The scale ranges from low GA up to high DI.
Next to each note of the scale, there is a tuning control with a number and up/down arrows. Using this control, the user can adjust the pitch of each note as desired, up to +10 micro-intervals higher or –10 micro-intervals lower, unless a pitch conflict occurs. For example, if the interval VOU–GA is 8 micro-intervals, VOU can only be raised by +6 micro-intervals, because at +8 it would coincide with GA, causing a conflict.
Directly below the scale, there is a dropdown menu showing the base note of the scale, which is also indicated by a red line on the scale.
The “Save Scale” button allows the user to save a customized scale after making adjustments. The base note must also be selected from the dropdown menu before saving.
When the Save Scale button is pressed, a message reminds the user that the scale must be saved inside a folder of their choice within a specific root folder (ScalesFolder), so that the application can locate the saved scales. Some default folders are already provided, but the user may create new folders inside the same root. This allows organizing custom scales into separate folders, as long as they remain inside the root directory recommended by the application.

Modes Panel

The Modes Panel is located directly below the Console Panel. Here, the user can change the scale used by the instrument. Each time a mode is selected, the instrument is “armed” with the corresponding scale.
Custom Scales
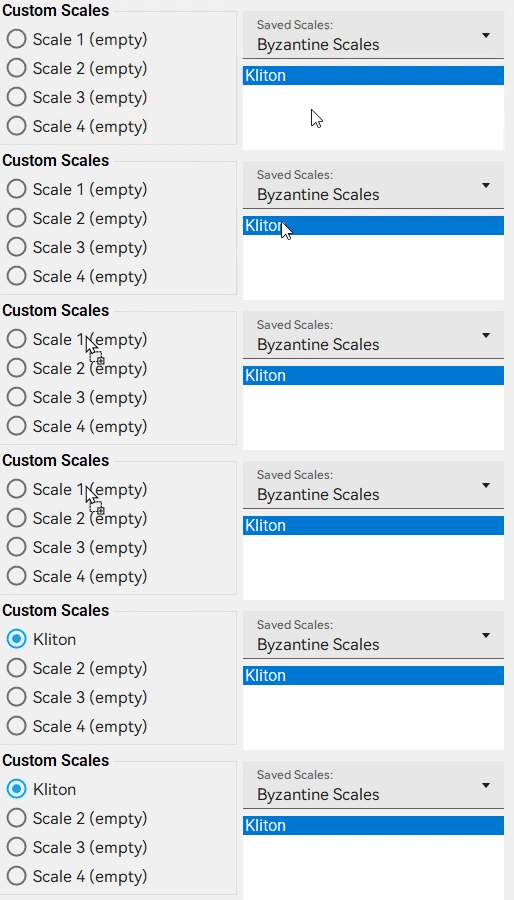
To the right of the default Byzantine Music modes, there is a dropdown menu containing the folders where custom scales have been saved. From this menu, the user can select a folder, and the list below it will load the scales stored in that folder. When a scale is selected from the list, the instrument is “armed” with it. The user may also select a scale and drag it onto one of the four selection buttons, so that the scale is stored there for quick access.
Alterations Panel

Here, the user can select an alteration or chroa in order to apply a temporary alteration to the scale.
When a alteration is clicked, the mouse cursor changes, and when it hovers over the melody keyboard it displays the icon of the selected alteration . The next step is to click the note that will receive the alteration. The alteration will be applied whether the note is pressed with the mouse, the computer keyboard, or the MIDI keyboard.
To remove the alteration and restore the original scale, the user must click the “Clear Alteration” button.
Melody Keyboard Panel

This panel contains the keys used to play the melody. The middle row of keys represents the notes of the scale.
Sharps and Flats
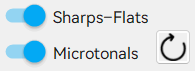
The keys in the top row of the keyboard represent the sharps of the notes directly beneath them, and the keys in the bottom row represent the flats of the notes directly above them. Using the Sharps–Flats switch located in the Alterations Panel, the user can choose whether the sharp and flat keys are visible on the instrument’s keyboard.
Microtonals
With the Microtonal switch, the user can choose whether the micro‑tuning adjusters for sharps and flats are visible on the note keys. When these Microtonal adjusters are visible, the user can modify the pitch of each sharp or flat individually. Clicking the reset icon located directly next to the switch, the default sharp–flat values for the selected mode are restored.

Ison (Drone) Keyboard Panel

This panel contains the keys used to play the Ison notes. Each note includes its corresponding sharp and flat. The pitches of the Ison notes are identical to those of the melody keyboard — meaning they automatically adapt to the active scale and any sharps or flats currently in use.
"Settings" Tab
In this tab, the user can create custom settings and save them, so they can be recalled easily and quickly whenever needed.
Show/Hide Panels

In the “Show/Hide Panels” button, the current settings of the Byzantine Organ are loaded into the Settings tab, allowing the user to edit them as needed.
Load Settings from the Byzantine Organ

By clicking the “Load Settings from the Byzantine Organ” button, the current settings of the Byzantine Organ are loaded into the Settings tab, allowing the user to edit as needed and save.
Adding Soundfont (SF2)

With the Add (SF2) button, the user can add a Soundfont (SF2) library of their choice to the list, as long as it is compatible. Only SoundFont2 libraries are supported — files with the *.sf2 extension.
Instrument Sorting

From the dropdown menu, you can choose how the instruments will be sorted within the list.
There are three available options: Alphabetical, Instrument Category, and GM Category.
1. Alphabetical – Instruments are sorted in alphabetical order.
2. Instrument Category – Instruments are grouped according to their type (Strings, Winds, etc.).
3. GM Category – Instruments are sorted according to the order defined by the soundfont’s manufacturer.
Save last settings on exit

With this option enabled, the user will find the instrument in its last-used configuration every time the application starts, even if the settings were not manually saved before closing the program.
Study Mode

When the instrument is in this mode, the computer keyboard is used to control the instrument both inside the application and outside of it, allowing the user to read a score while playing. However, the application does not block text input in other programs that may be open at the same time. For safe use, it is recommended that the user close any active applications that accept text input, or ensure that the cursor is not placed in a text field to avoid unintended typing.
Custom Scale Management
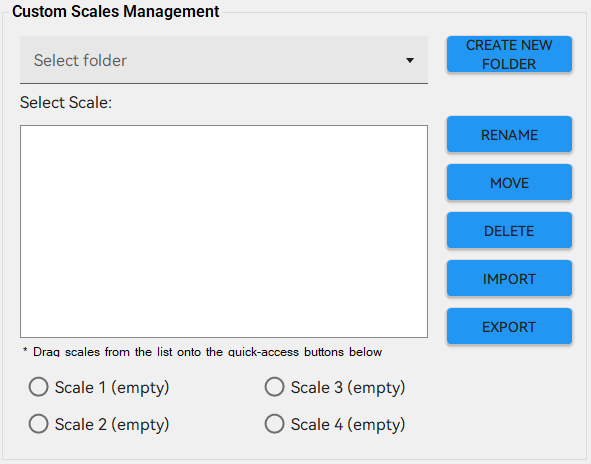
Here, the user can create a new folder to organize their scales, rename, move, or delete any custom scale they wish. They can also share their scales with colleagues or classmates using the Import and Export buttons. Scale files use the *.boscl extension.
Load/Save Settings Profiles
Here, the user can save all the settings they have configured on the instrument so that they are available whenever needed. When a settings profile is selected, a preview of its contents is loaded into the current page. To apply the profile to the instrument itself, the user must click the “Apply settings to the Byzantine Organ” button.

Load settings to the Byzantine Organ
By clicking the “Load settings to the Byzantine Organ” button, once the user has finished configuring the settings or has selected a profile from the list of settings profiles, the settings are loaded into the instrument.
"KeyMap" Tab
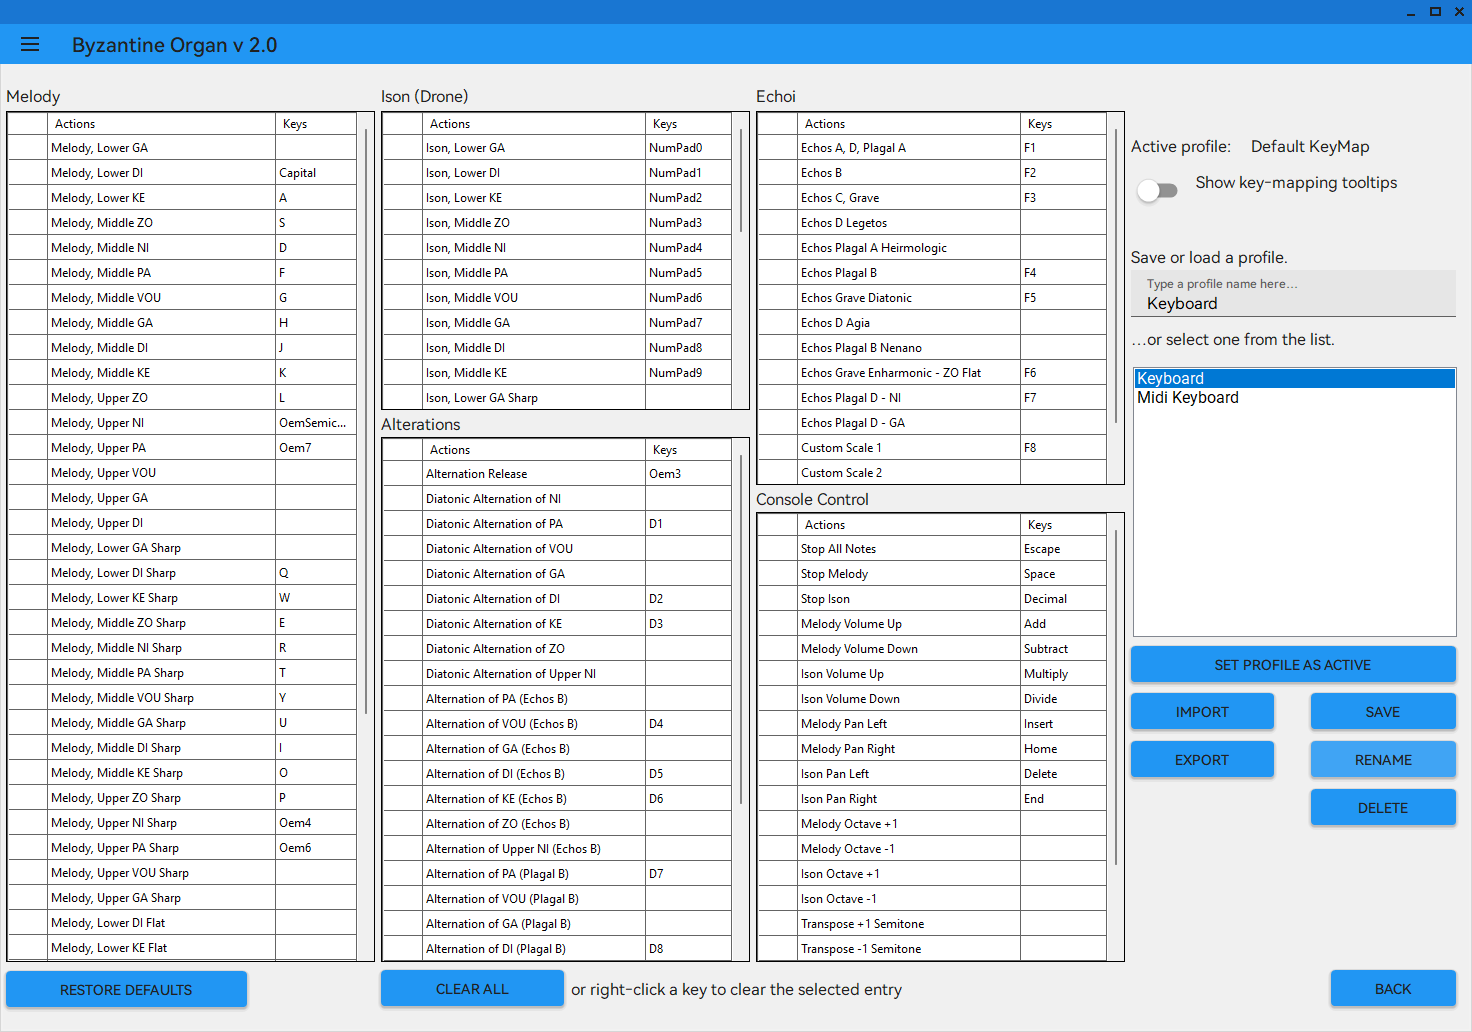
This tab allows the user to define how the computer keyboard or the midi keyboard controls the Byzantine Organ. Through this page, the user can assign keys for Melody, Ison, Modes, Alterations, and Console functions, fully customizing the performance experience. The page is organized into sections so the user can easily locate and configure the mappings they need. Key assignment is simple and performed directly within the tables of the page.
How Key Assignment Works

- The user locates the actions they want to assign (e.g., melody note, ison note, mode, alteration, or console function).
- In the row of that action, the user clicks the empty cell next to the description.
- The cell turns green, indicating that the application is waiting for a new key input.
- The user presses the desired keyboard or midi keyboard key.
- The application records the key for that specific action.
- To complete the process, the user must save the profile and then set it as active for the new mappings to take effect.
Detecting Duplicate Key Assignments (Red Cell)

A red indicator serves as a warning that a key conflict exists. If the user assigns a key that is already used by another function, both cells that use the same key turn red. The user must adjust one of the two assignments so they do not share the same key before pressing Save.
Clearing Key Assignments

To remove an existing key assignment, the user can right‑click on the cell containing the key. The application immediately clears the cell, allowing the user to assign a new key or leave the function unassigned. Additionally, the user may select multiple cells and perform a bulk deletion, clearing several assignments at once.
Note for MIDI Keyboard Mapping
When assigning a MIDI control, knob (rotary controller) or slider (linear fader) to parameters such as volume, stereo balance, octave or pitch shift, selecting either the increase or the decrease action is sufficient. The application automatically detects and registers both directions under the same MIDI control.
Show Key‑Mapping Tooltips

With this option, the user can enable the display of helpful tooltips on the Organ’s keys. When the mouse hovers over a key, a tooltip appears showing the keyboard key assigned to it, helping the user easily remember the mappings they have set. This feature is especially useful during the first steps of using the instrument, when the user has not yet become familiar with the key mappings.
Key Mapping Profile Management
The application allows the user to store key mappings in separate profiles, enabling different setups depending on their needs (e.g., live performance, practice, special scales).
Set Profile as Active
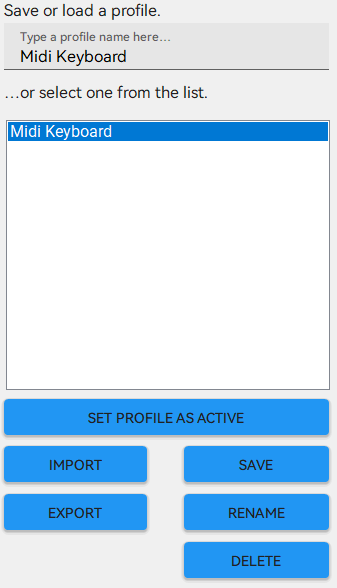
With the “Set Profile as Active” button, the user selects which profile will be used by the application. Once a profile is active, all instrument actions (melody, ison, alterations, modes, and console controls) operate according to the mappings stored in that profile.
Save
After making any changes to the key mappings, the user must press “Save” so the changes are written to the profile. To apply the updated mappings to the instrument, the user must then press “Set Profile as Active”. This ensures the application uses the newly updated assignments.
Save As
With the “Save” button, the user can create a new profile based on the profile selected in the list. After selecting the profile, the user enters a new name, and the application saves the current mappings as a separate profile without modifying the original.
Rename
With the “Rename” button, the user can change the name of the profile selected in the list. Renaming helps keep profiles organized and easy to identify.
Delete
The “Delete” button permanently removes the selected profile from the list. Deletion cannot be undone.
Import Profile
With the “Import Profile” button, the user can load a profile previously saved or received from another user of the application.
Export Profile
The “Export Profile” button allows the user to save the selected profile to a folder, so it can be transferred or shared.
Restore Default Profile

With the “Restore Defaults” button, the user can revert the key‑mapping profile to its default state. The application replaces the current assignments with the original factory settings, allowing the user to start from a clean, basic keyboard layout.
To continue using the default profile, the user must then press “Save” and afterwards “Set Profile as Active”, so that the default assignments become active in the instrument. “Save” και έπειτα “Set Profile as Active”, ώστε οι προεπιλεγμένες αντιστοιχίσεις να τεθούν σε λειτουργία.
"Appearance" Tab
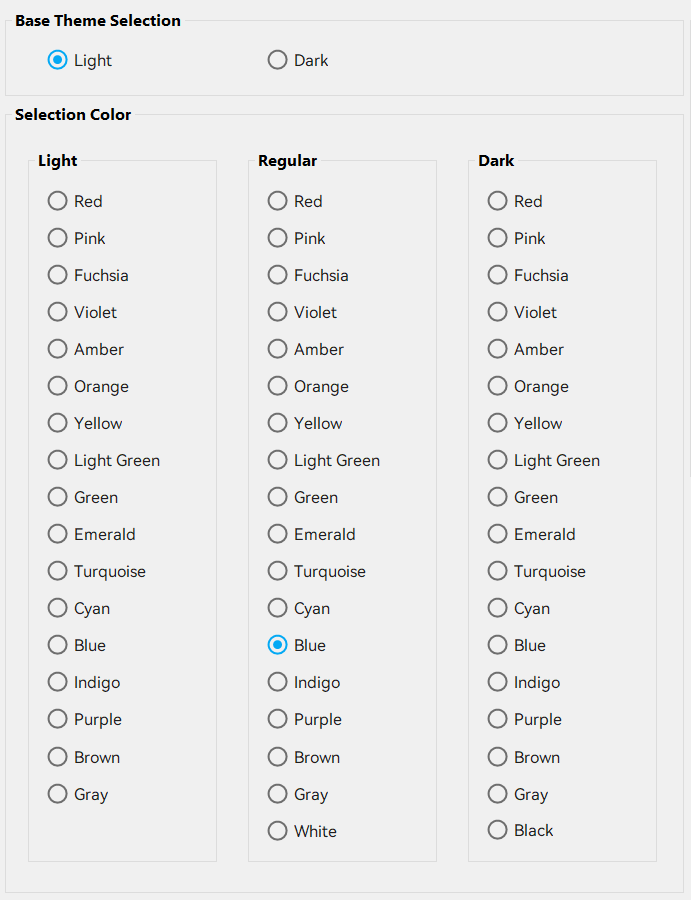
The Appearance tab allows the user to customize the visual look of the application by selecting a base theme and a color scheme. These changes affect all interface elements, providing a more pleasant and personalized user experience.
Base Theme Selection
The user can choose between two base themes:
Light
Dark
The base theme determines the overall brightness and contrast of the application.
Color Selection
The tab offers three color categories:
Light
Regular
Dark